
Second Fix
Plastering, fitting, finishing, and making it a room
9 tasks in this phase
What second fix covers, and what sets the order
Second fix is the stage where a weathertight shell becomes a room you can actually use. Plaster goes on the walls. Sockets, switches and light fittings appear on the ends of cables that have been hanging out of stud walls since first fix. Taps, wastes and radiators go onto pipework that was capped and pressure-tested months earlier. Floors get levelled and covered, walls get painted, and the kitchen goes in.
If you want the dividing line between the two stages set out properly, first fix vs second fix covers it. The more useful question on site is what order all of this runs in.
It is not decided by who happens to be free that week. It is decided by what has to dry.
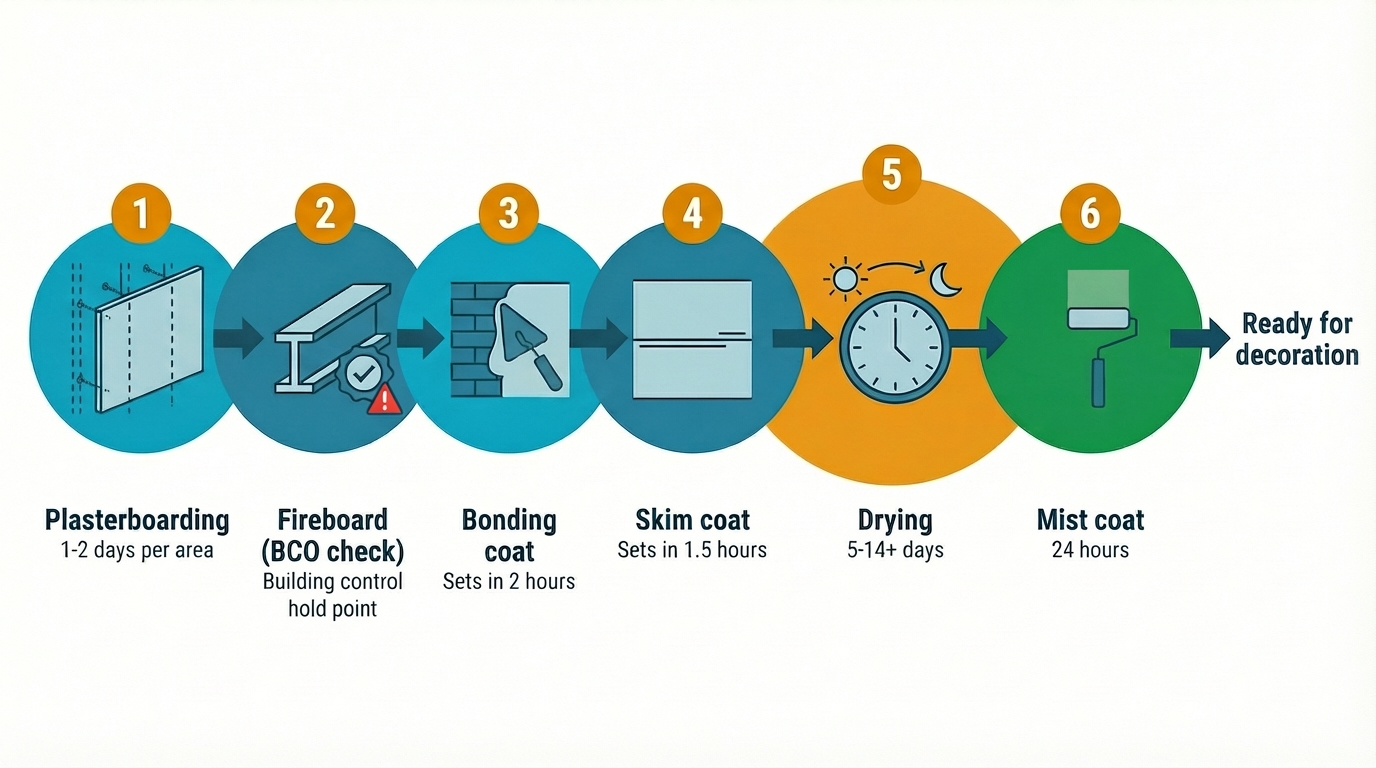
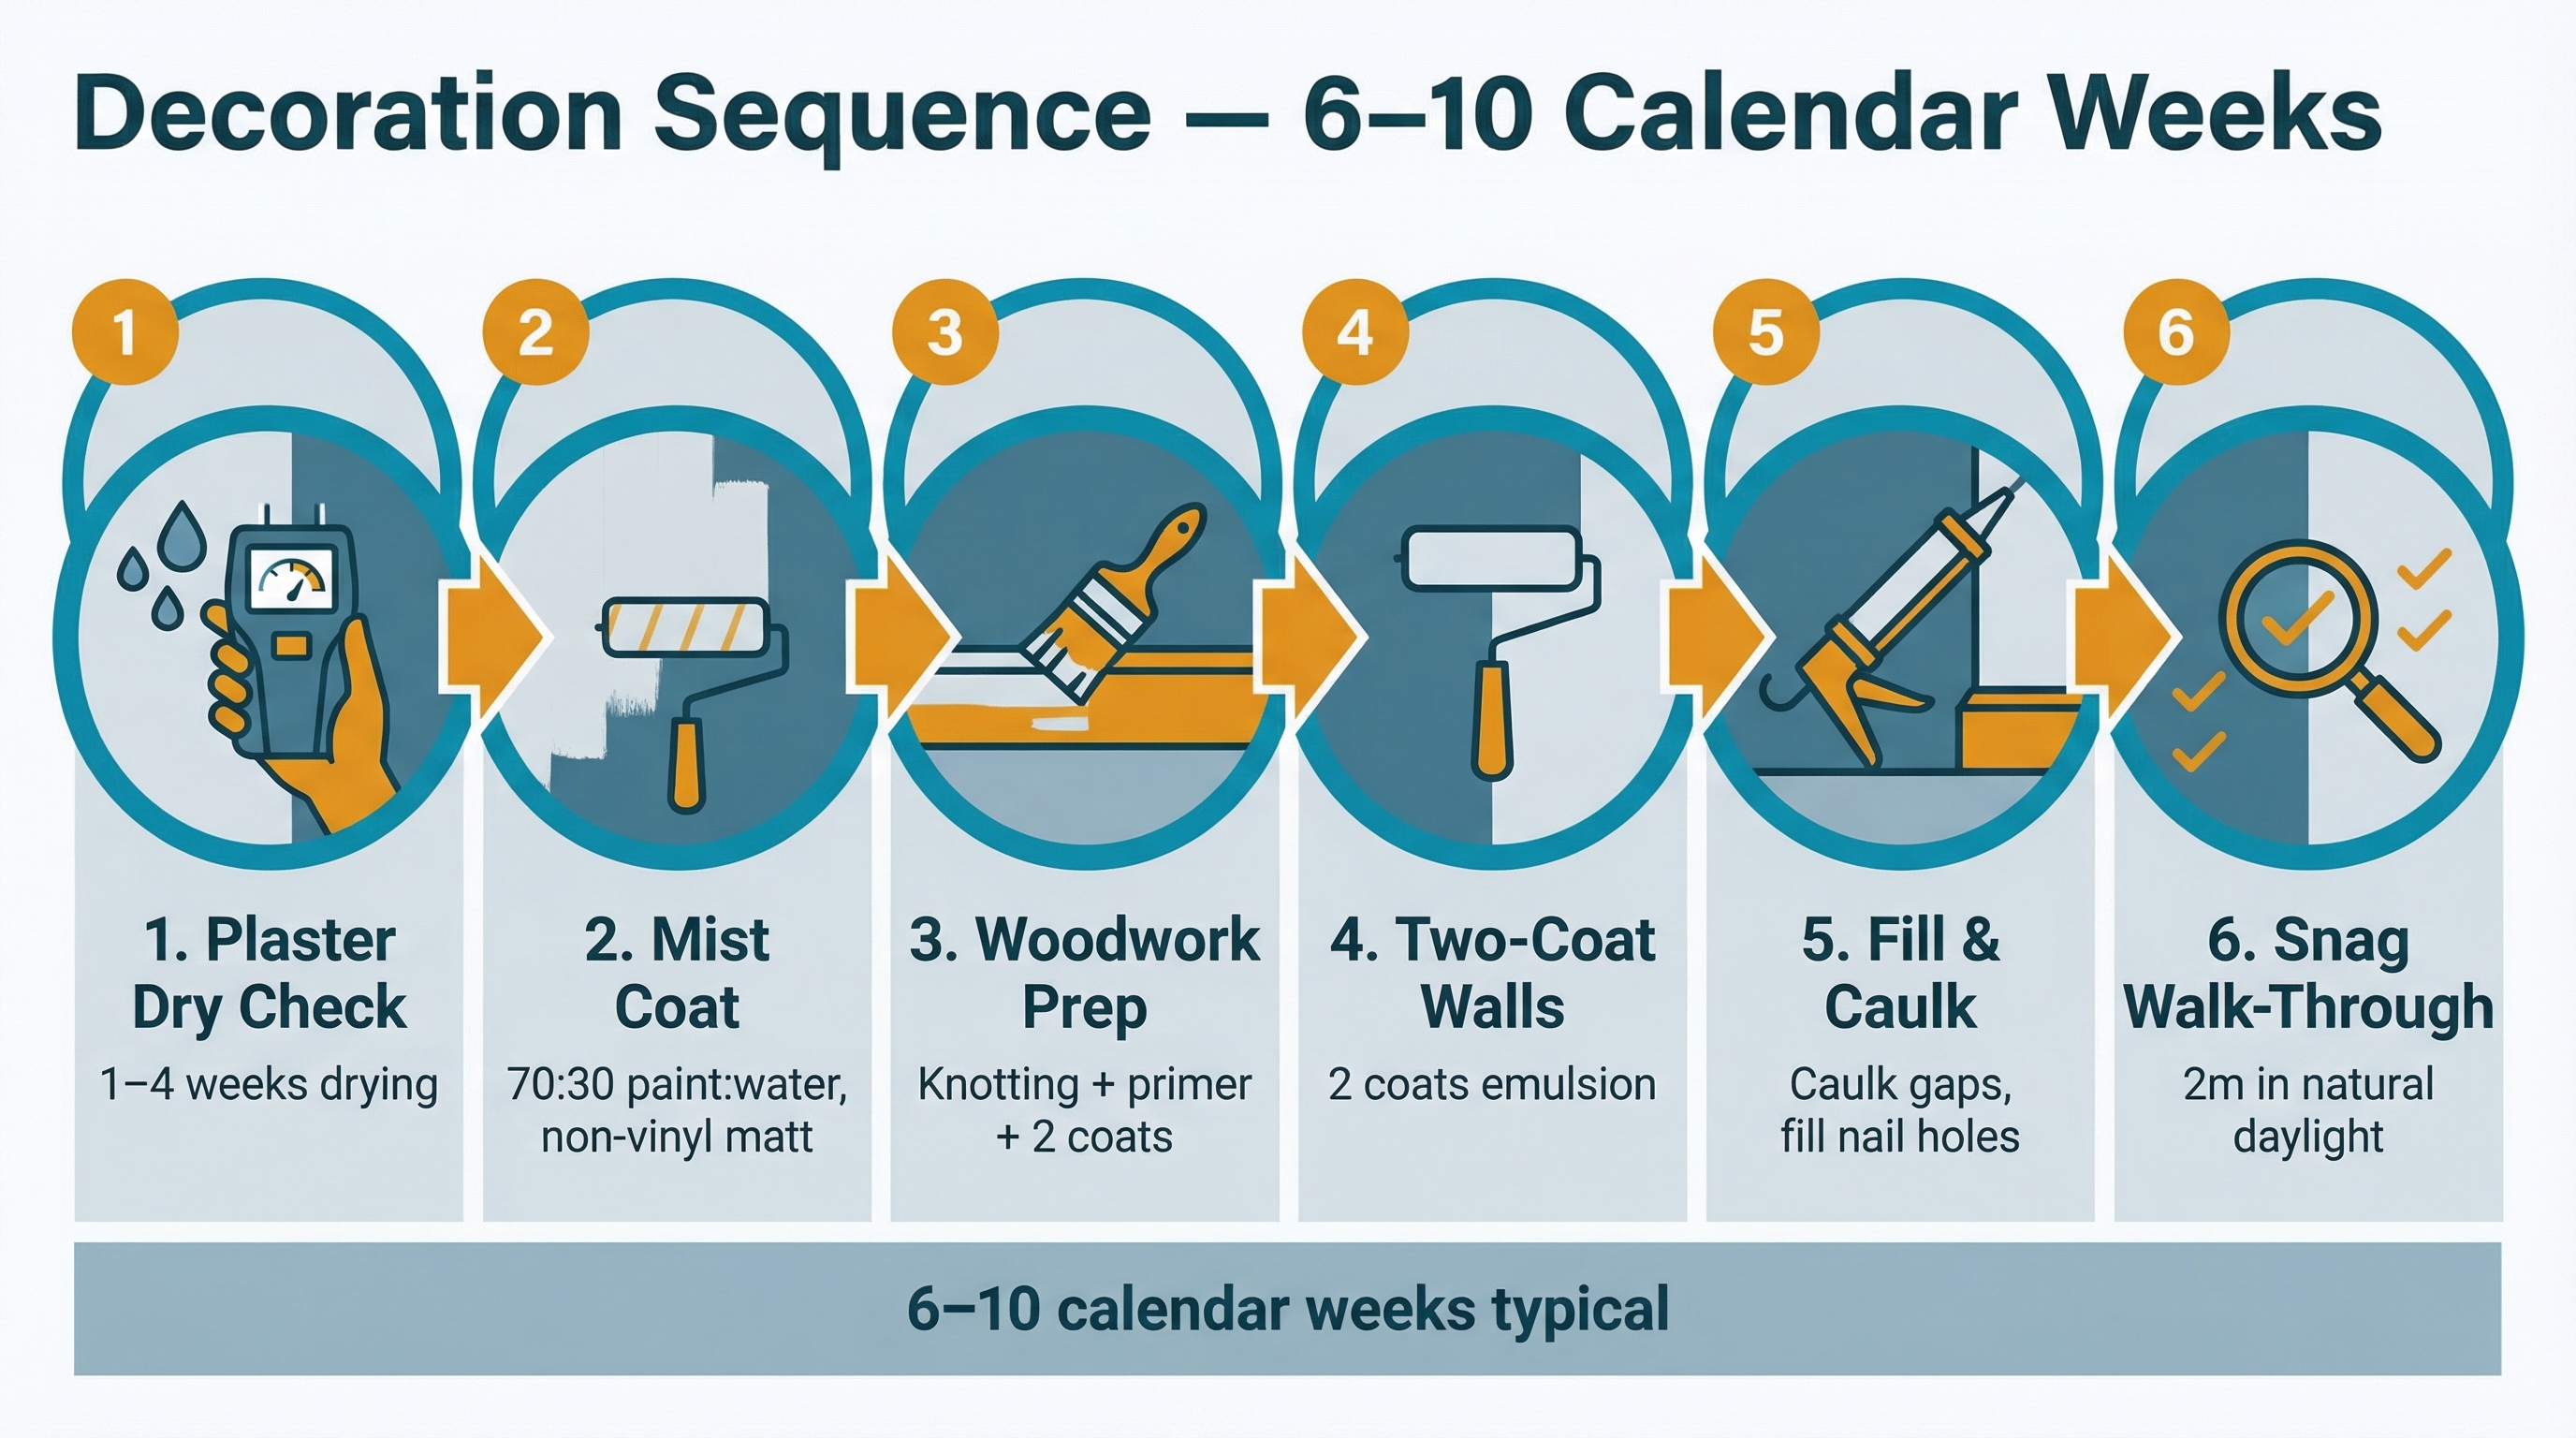
Plastering is the gate for almost everything above floor level. Fresh plaster holds a lot of water and has to give that water up before anything is fixed to it or painted onto it. Hang wall units on green plaster and the fixings work loose. Put emulsion on before the wall has changed colour right through and you seal the moisture in, which is how you end up with patchy sheen, flaking, and a surface that has to be stripped back and redone. Decoration waits for plaster. Every time.
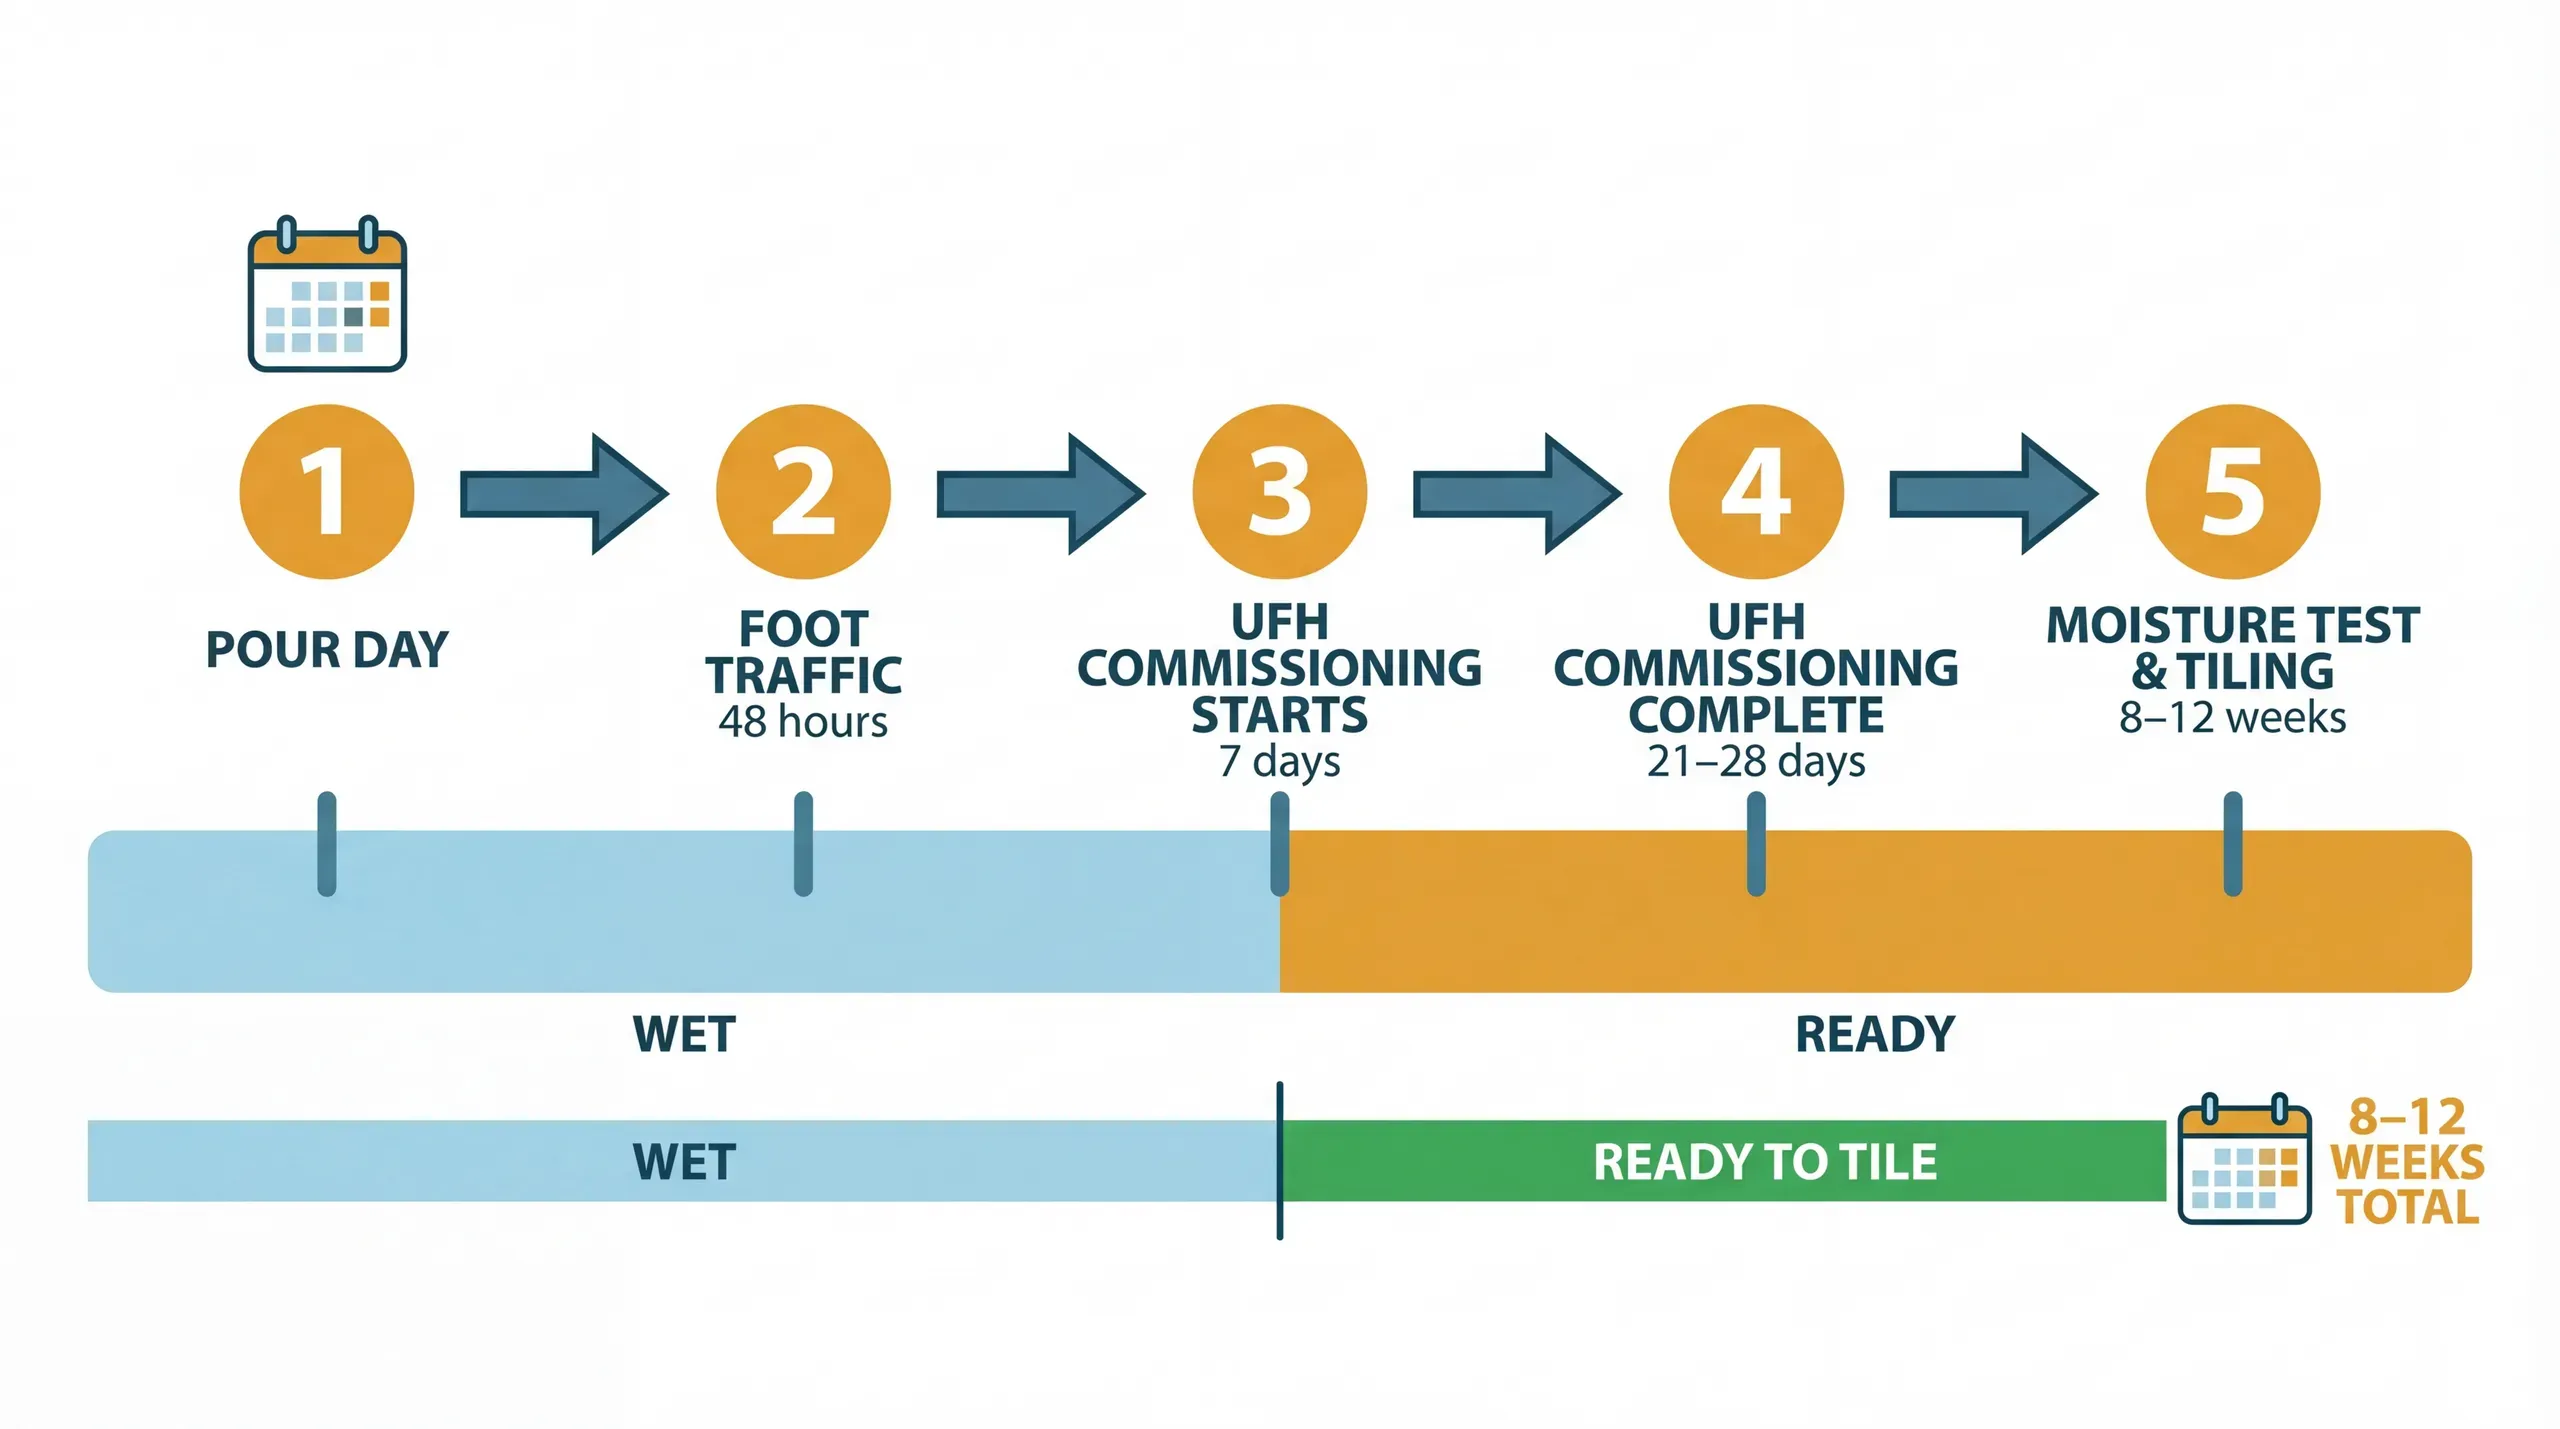
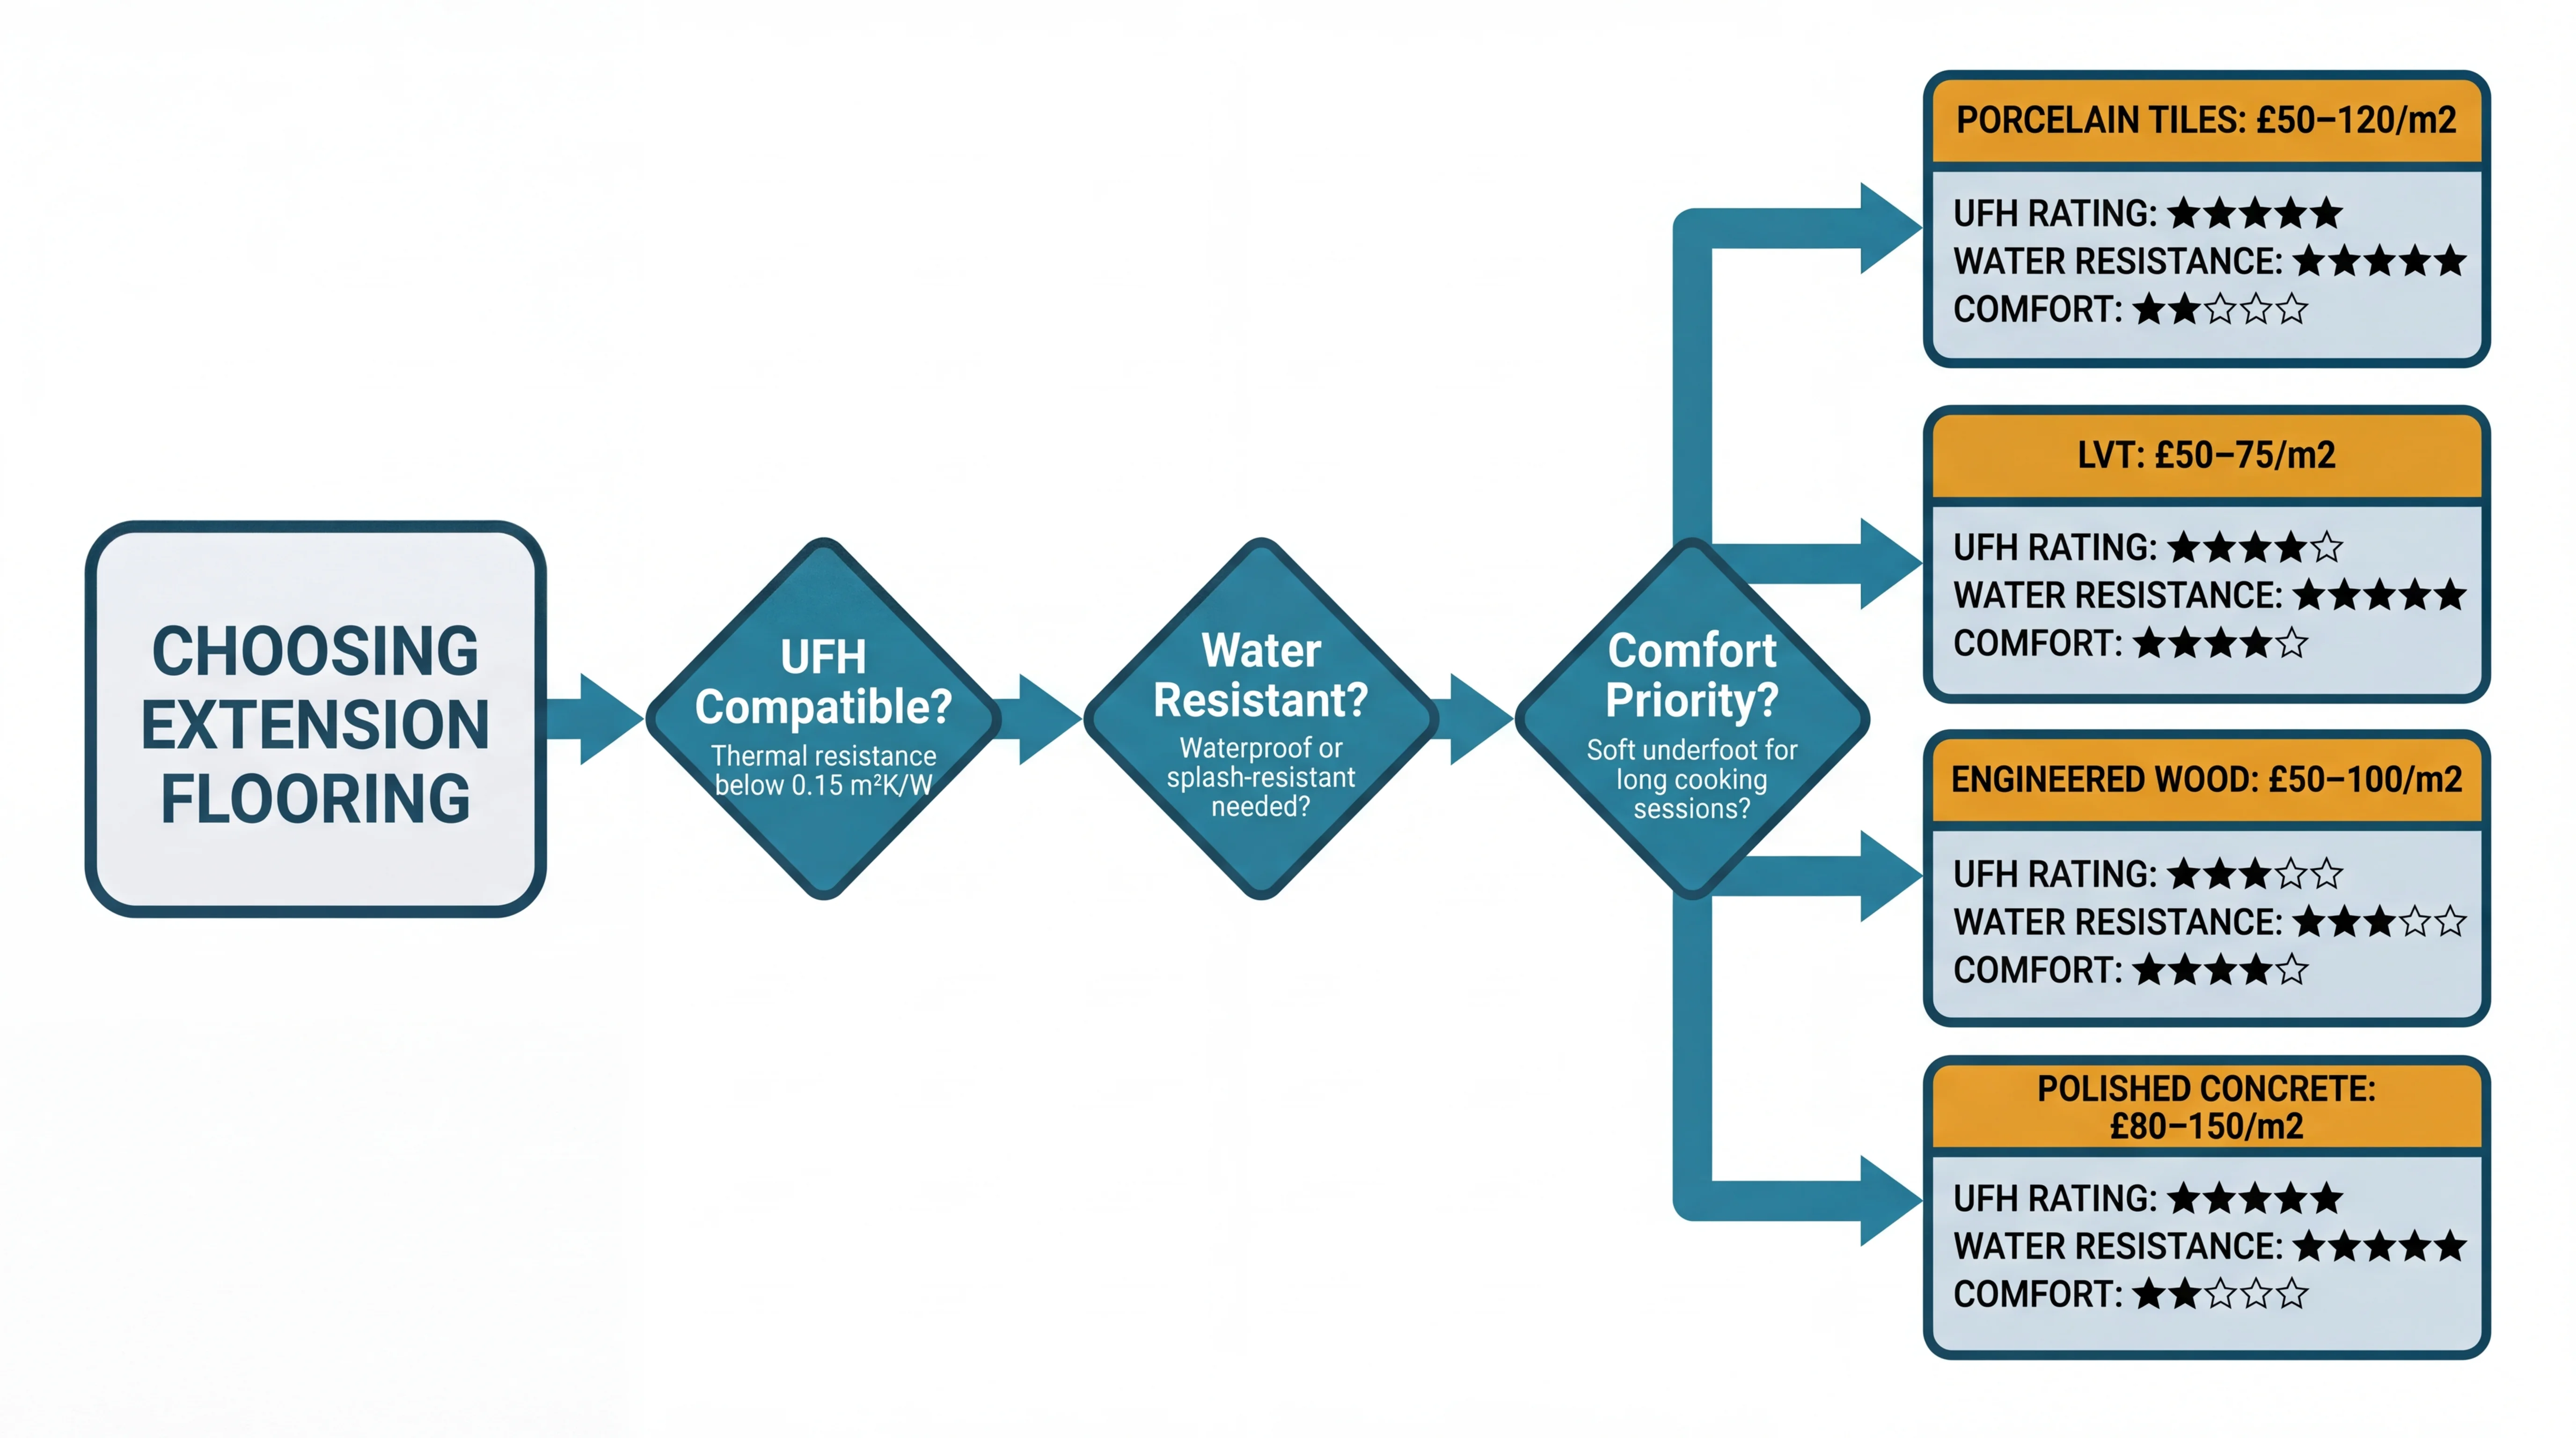
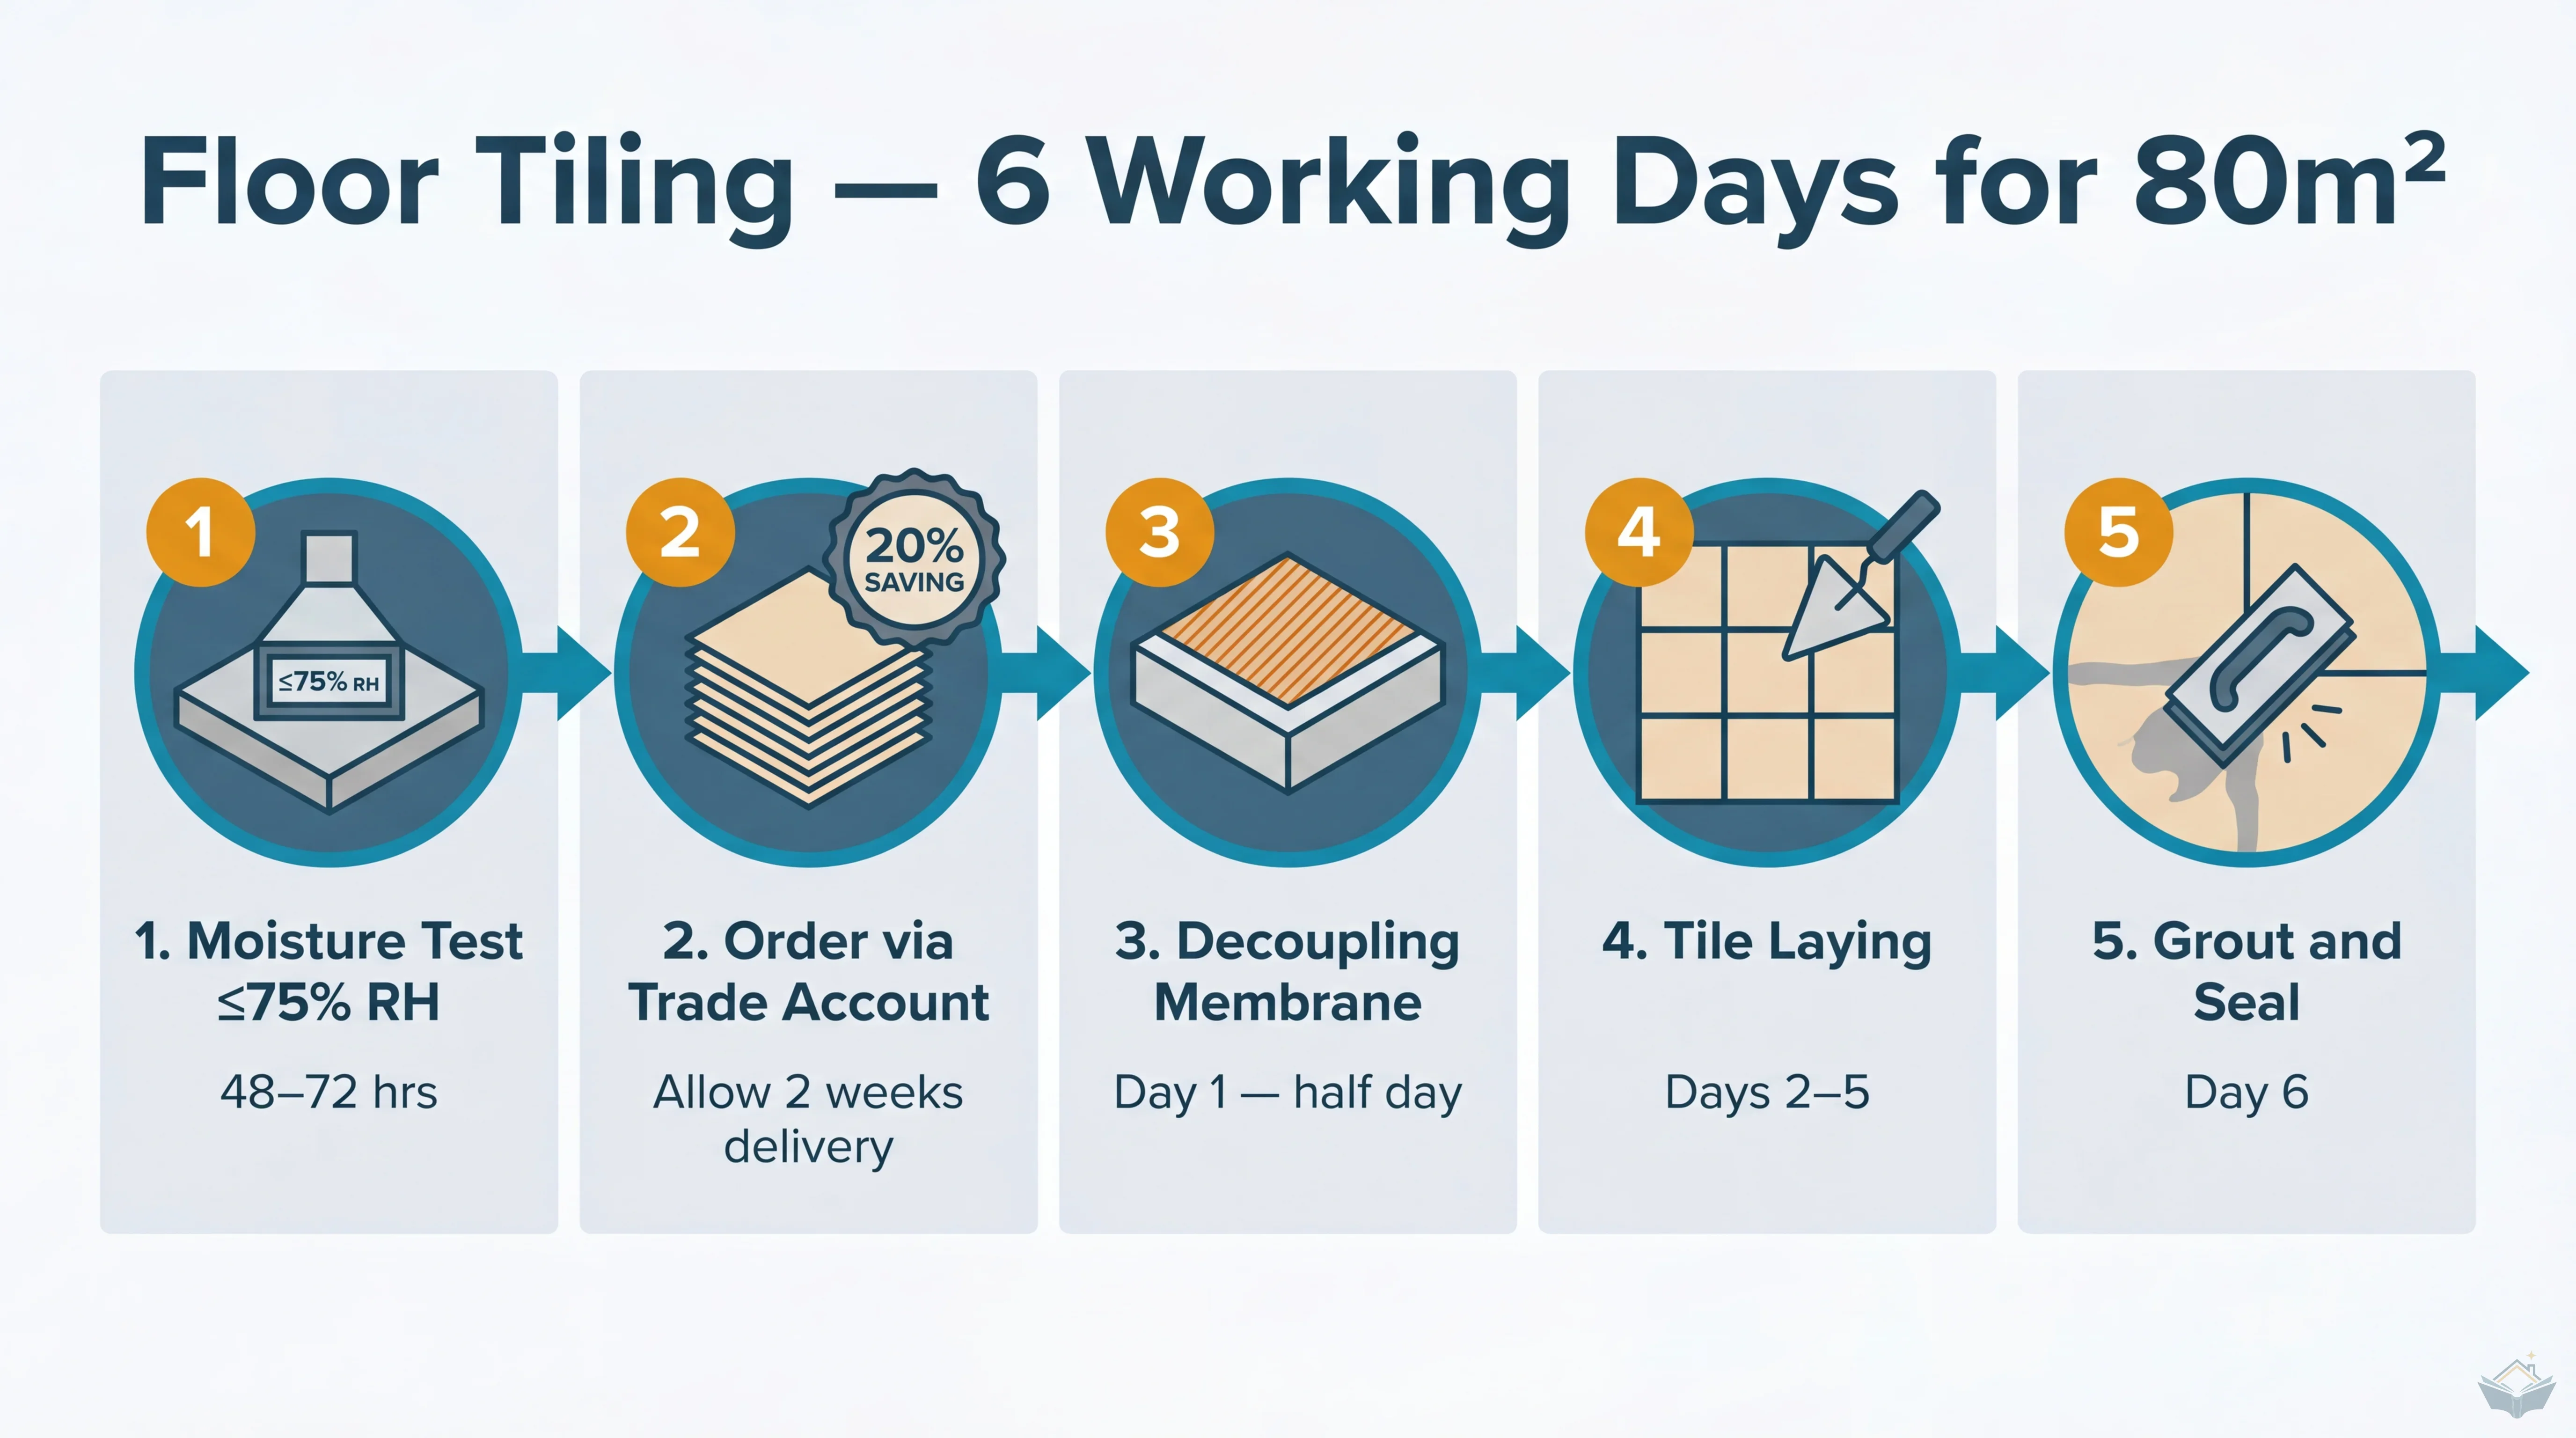
Screeding is the bigger constraint, and the one that catches most people project managing their own build. Screed gives up moisture slowly, and a thick screed over underfloor heating gives it up very slowly indeed in a cold, damp, poorly ventilated British house. Tile adhesive and timber both fail over a screed that is still wet, so the trigger for flooring is a moisture reading, not a date in the diary. Put that wait into the programme as a planned block before the screed is even poured. Finding out about it afterwards is what turns a manageable pause into a stalled site with trades booked and nothing for them to do.
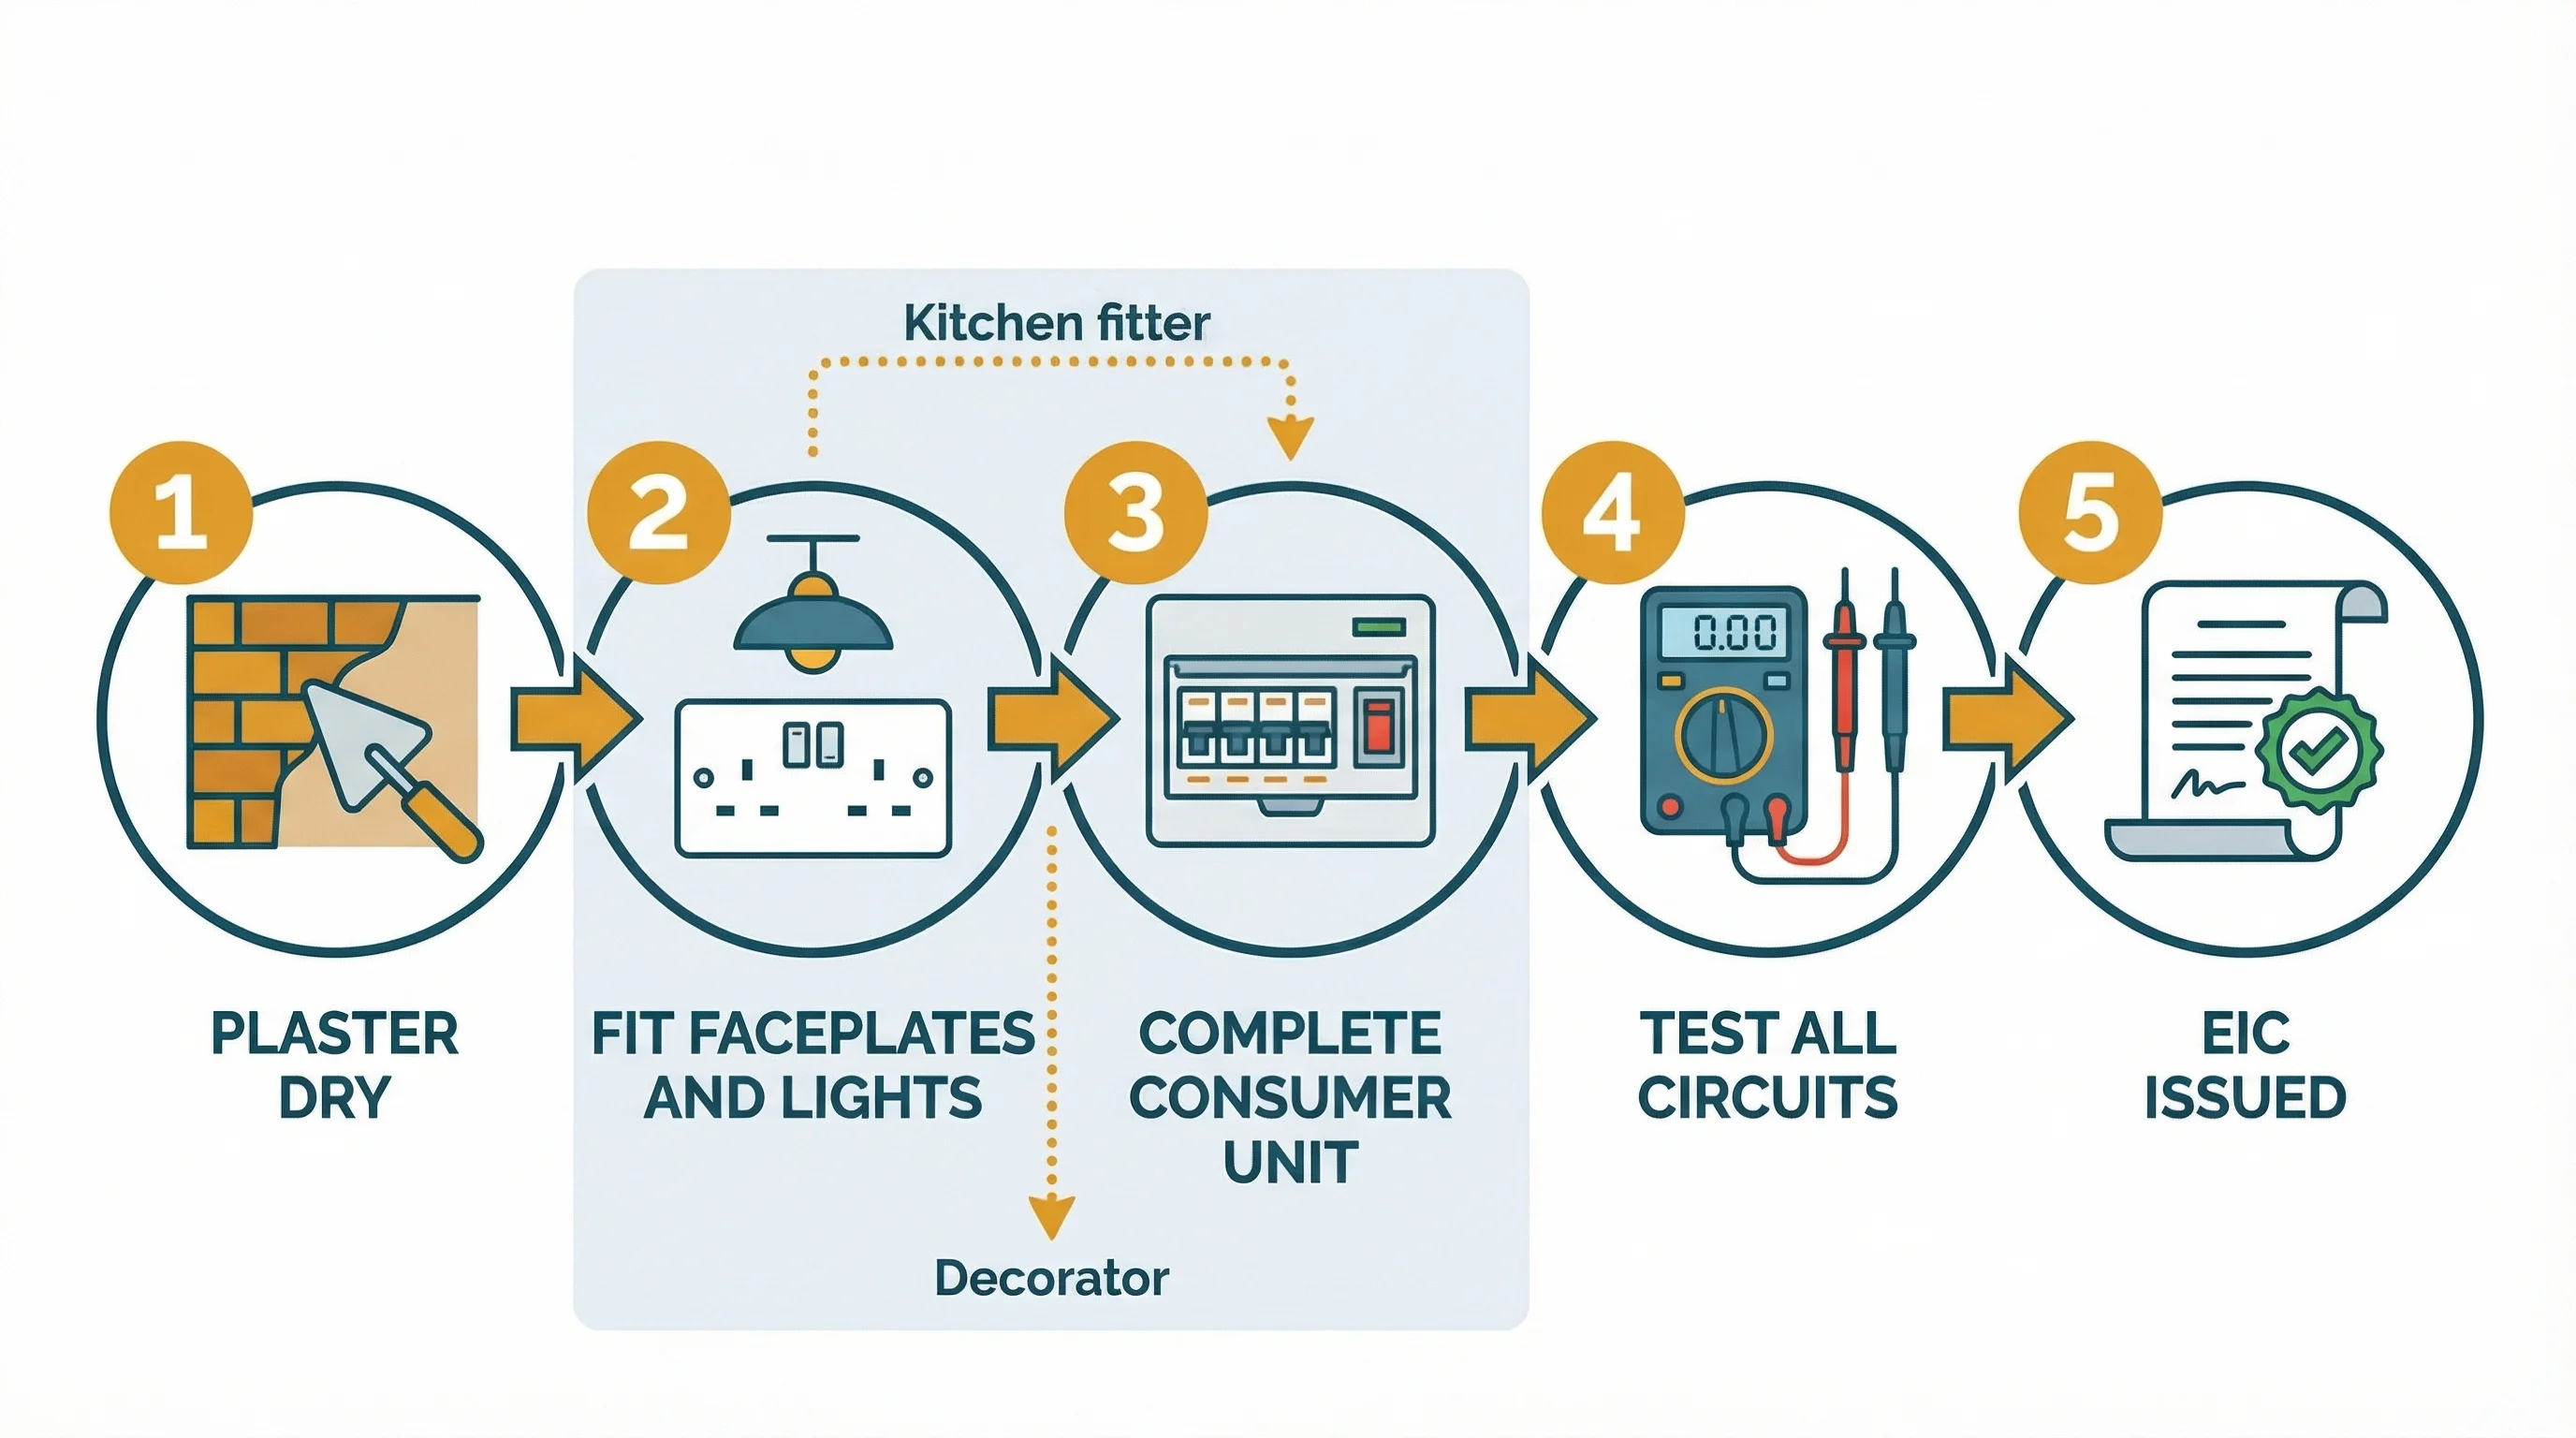
Second fix electrics and second fix plumbing fit around those two waits. Both need plaster complete, and both need to be finished and tested before the kitchen fitter can do anything useful.
Where the kitchen install sits
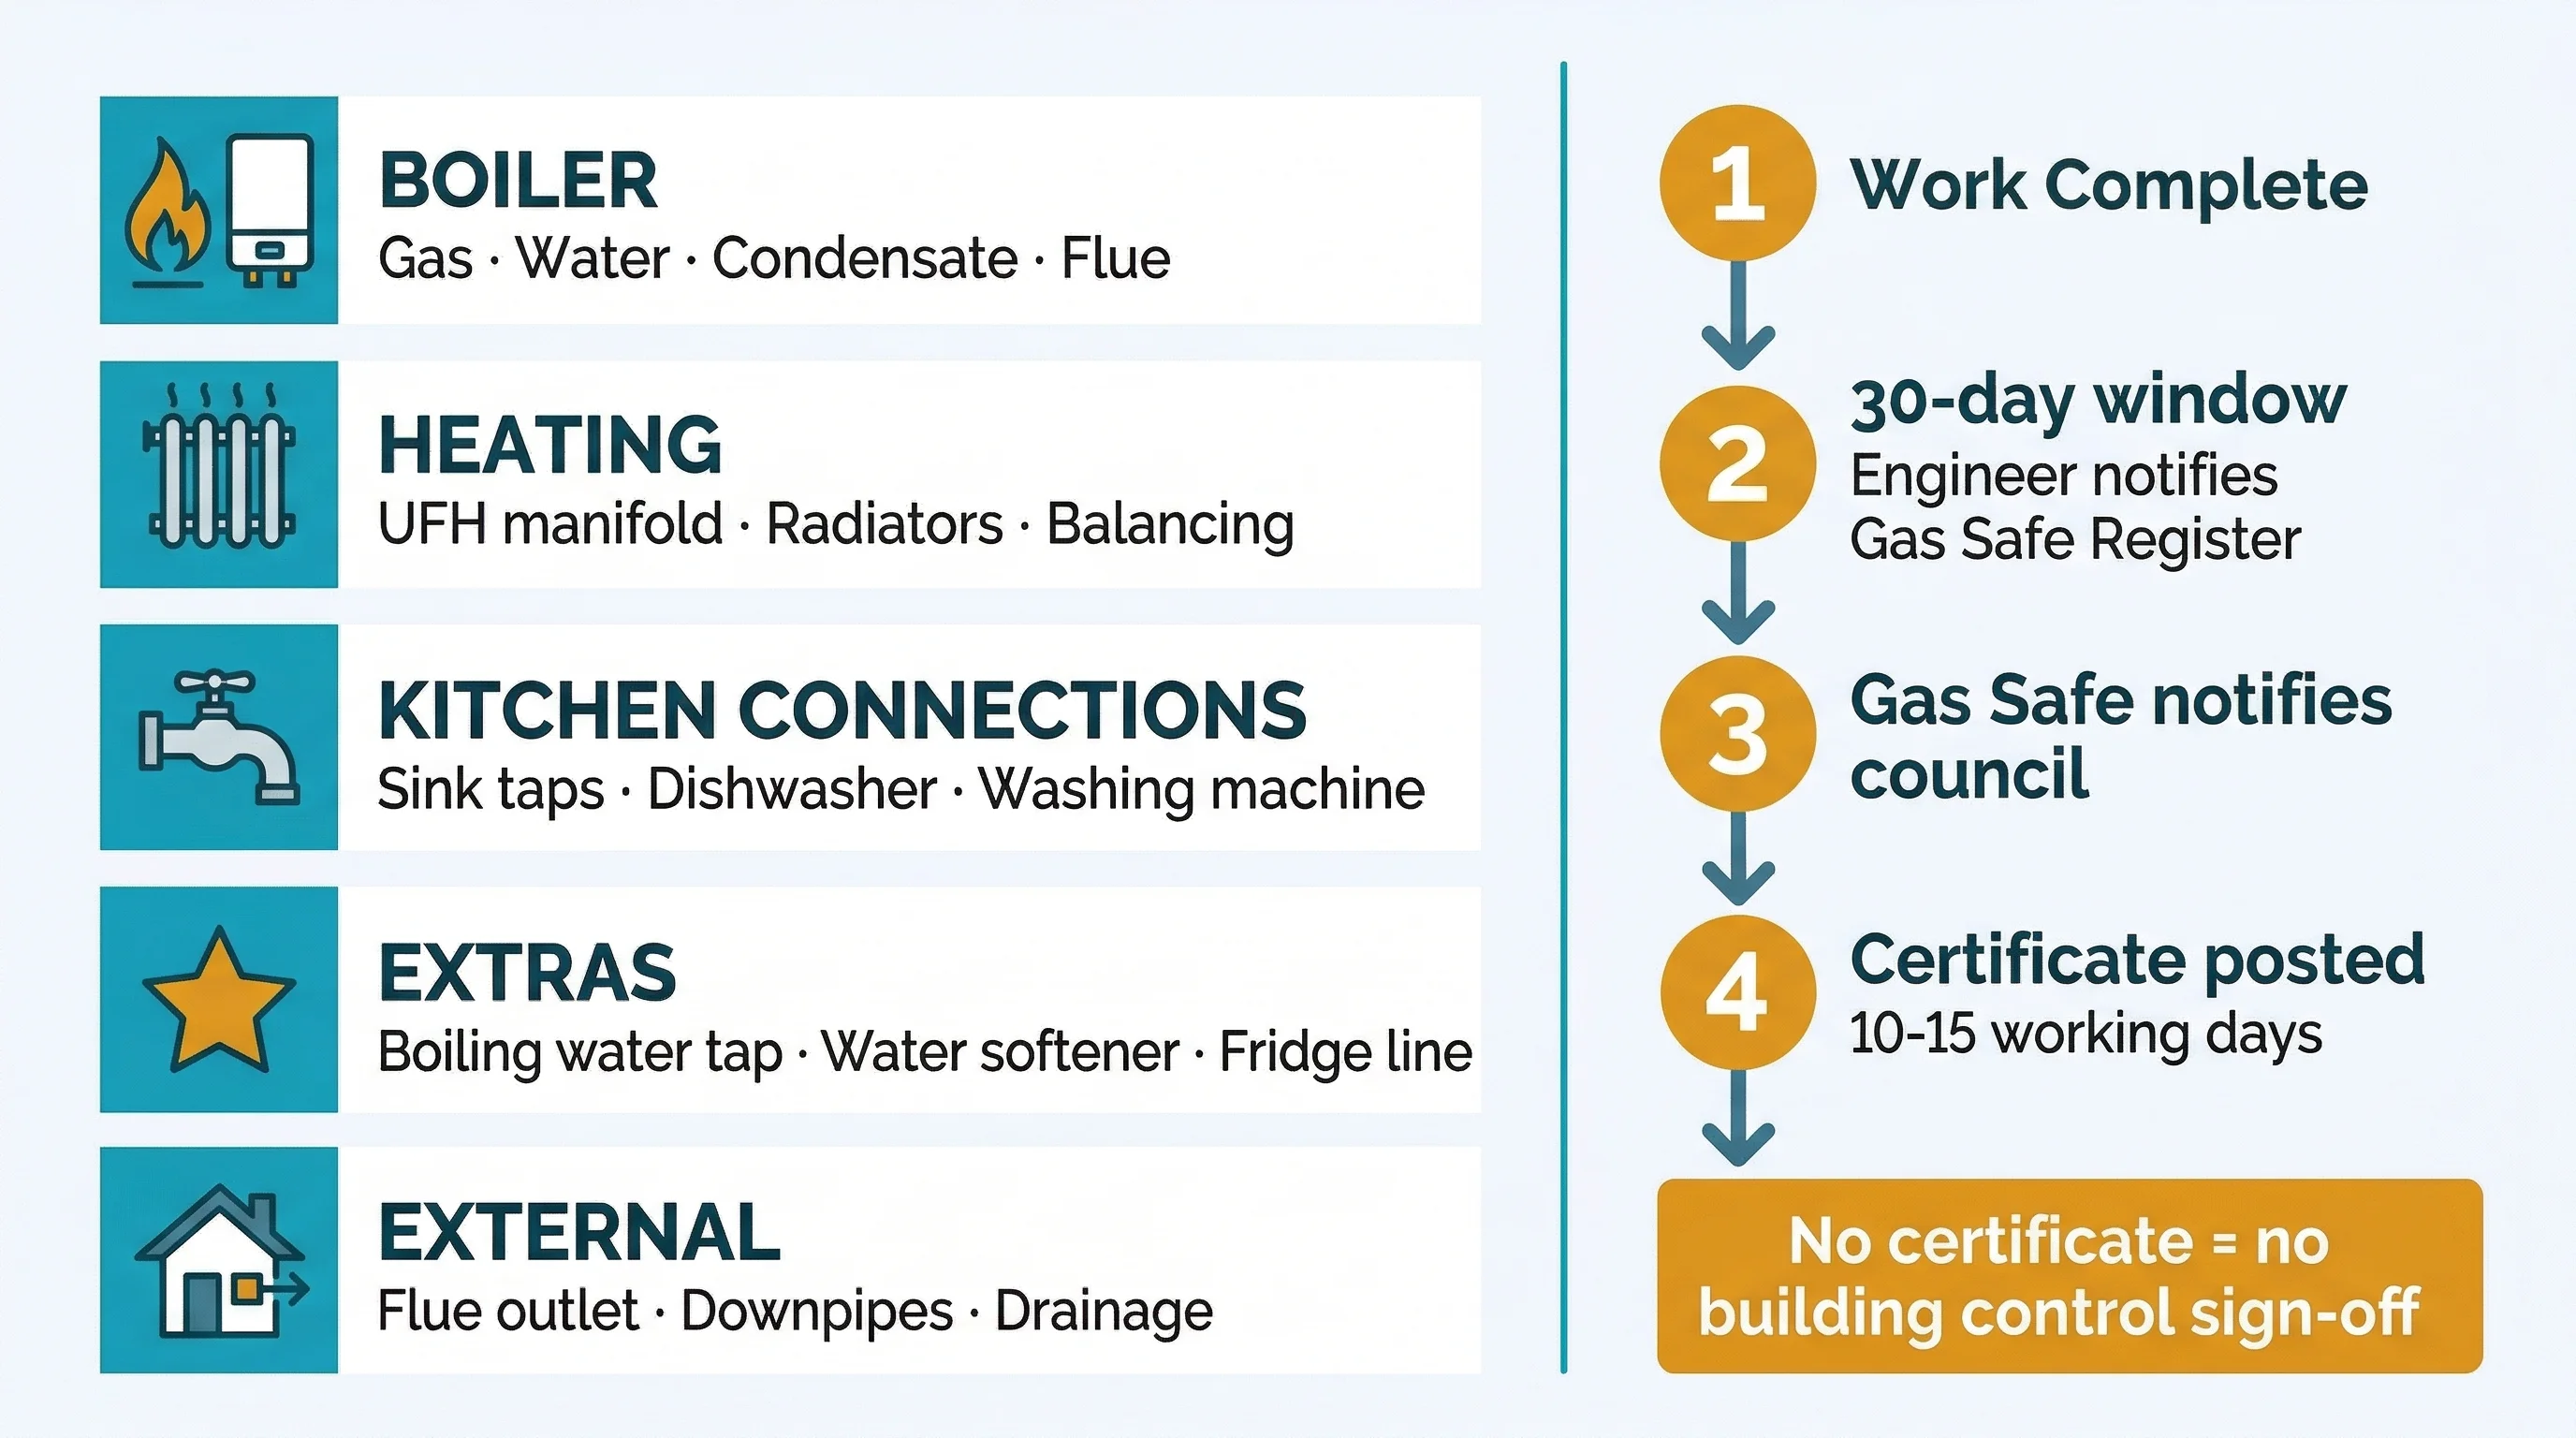
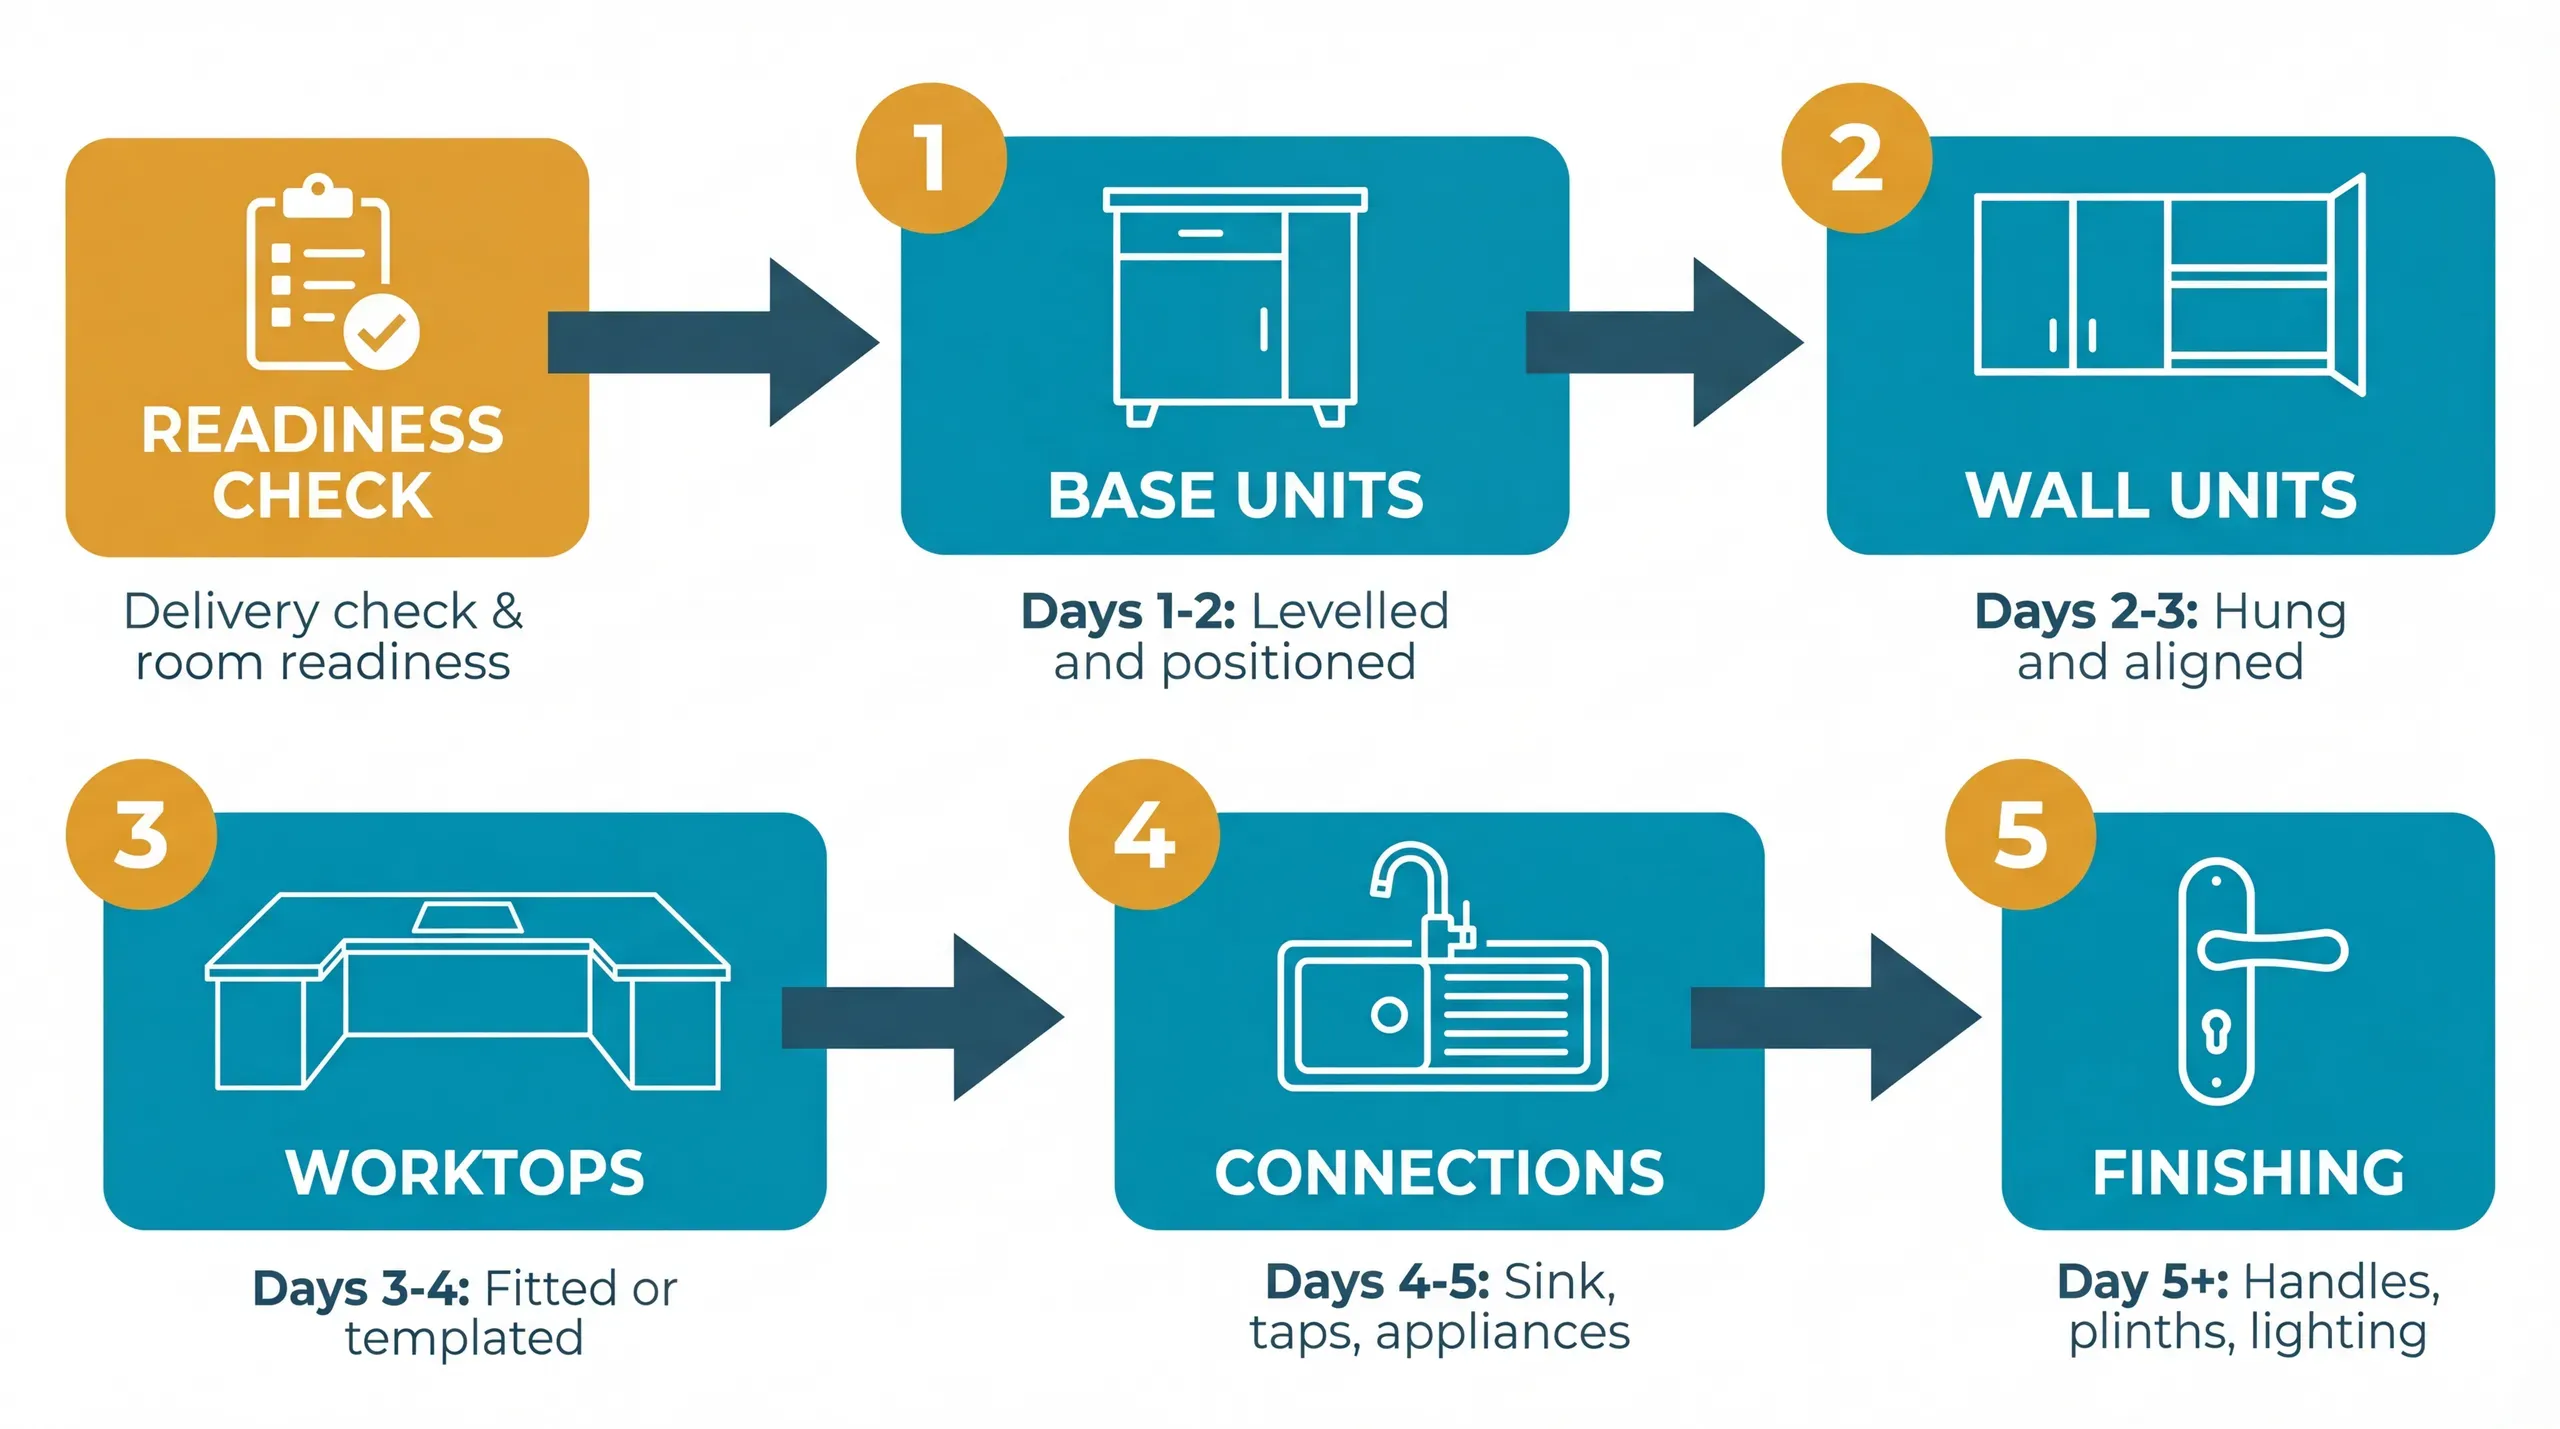
The kitchen fitter is the one trade you cannot pull forward to fill a gap. Kitchen installation needs walls plastered and properly dry, sockets and switches in their final positions with faceplates on, capped supplies and wastes exactly where the sink, dishwasher and washing machine are going, gas capped and accessible behind the hob position, and a floor that is level and at its finished height.
It also needs every box on site and opened. Wrong or missing parts are the most common reason a fitting week collapses, and replacements are not quick.
Book your fitter against readiness rather than against a hopeful date, and confirm the week before. A fitter standing in a room waiting for an electrician to move a socket is being paid either way.
Worktop templating is a scheduled gap
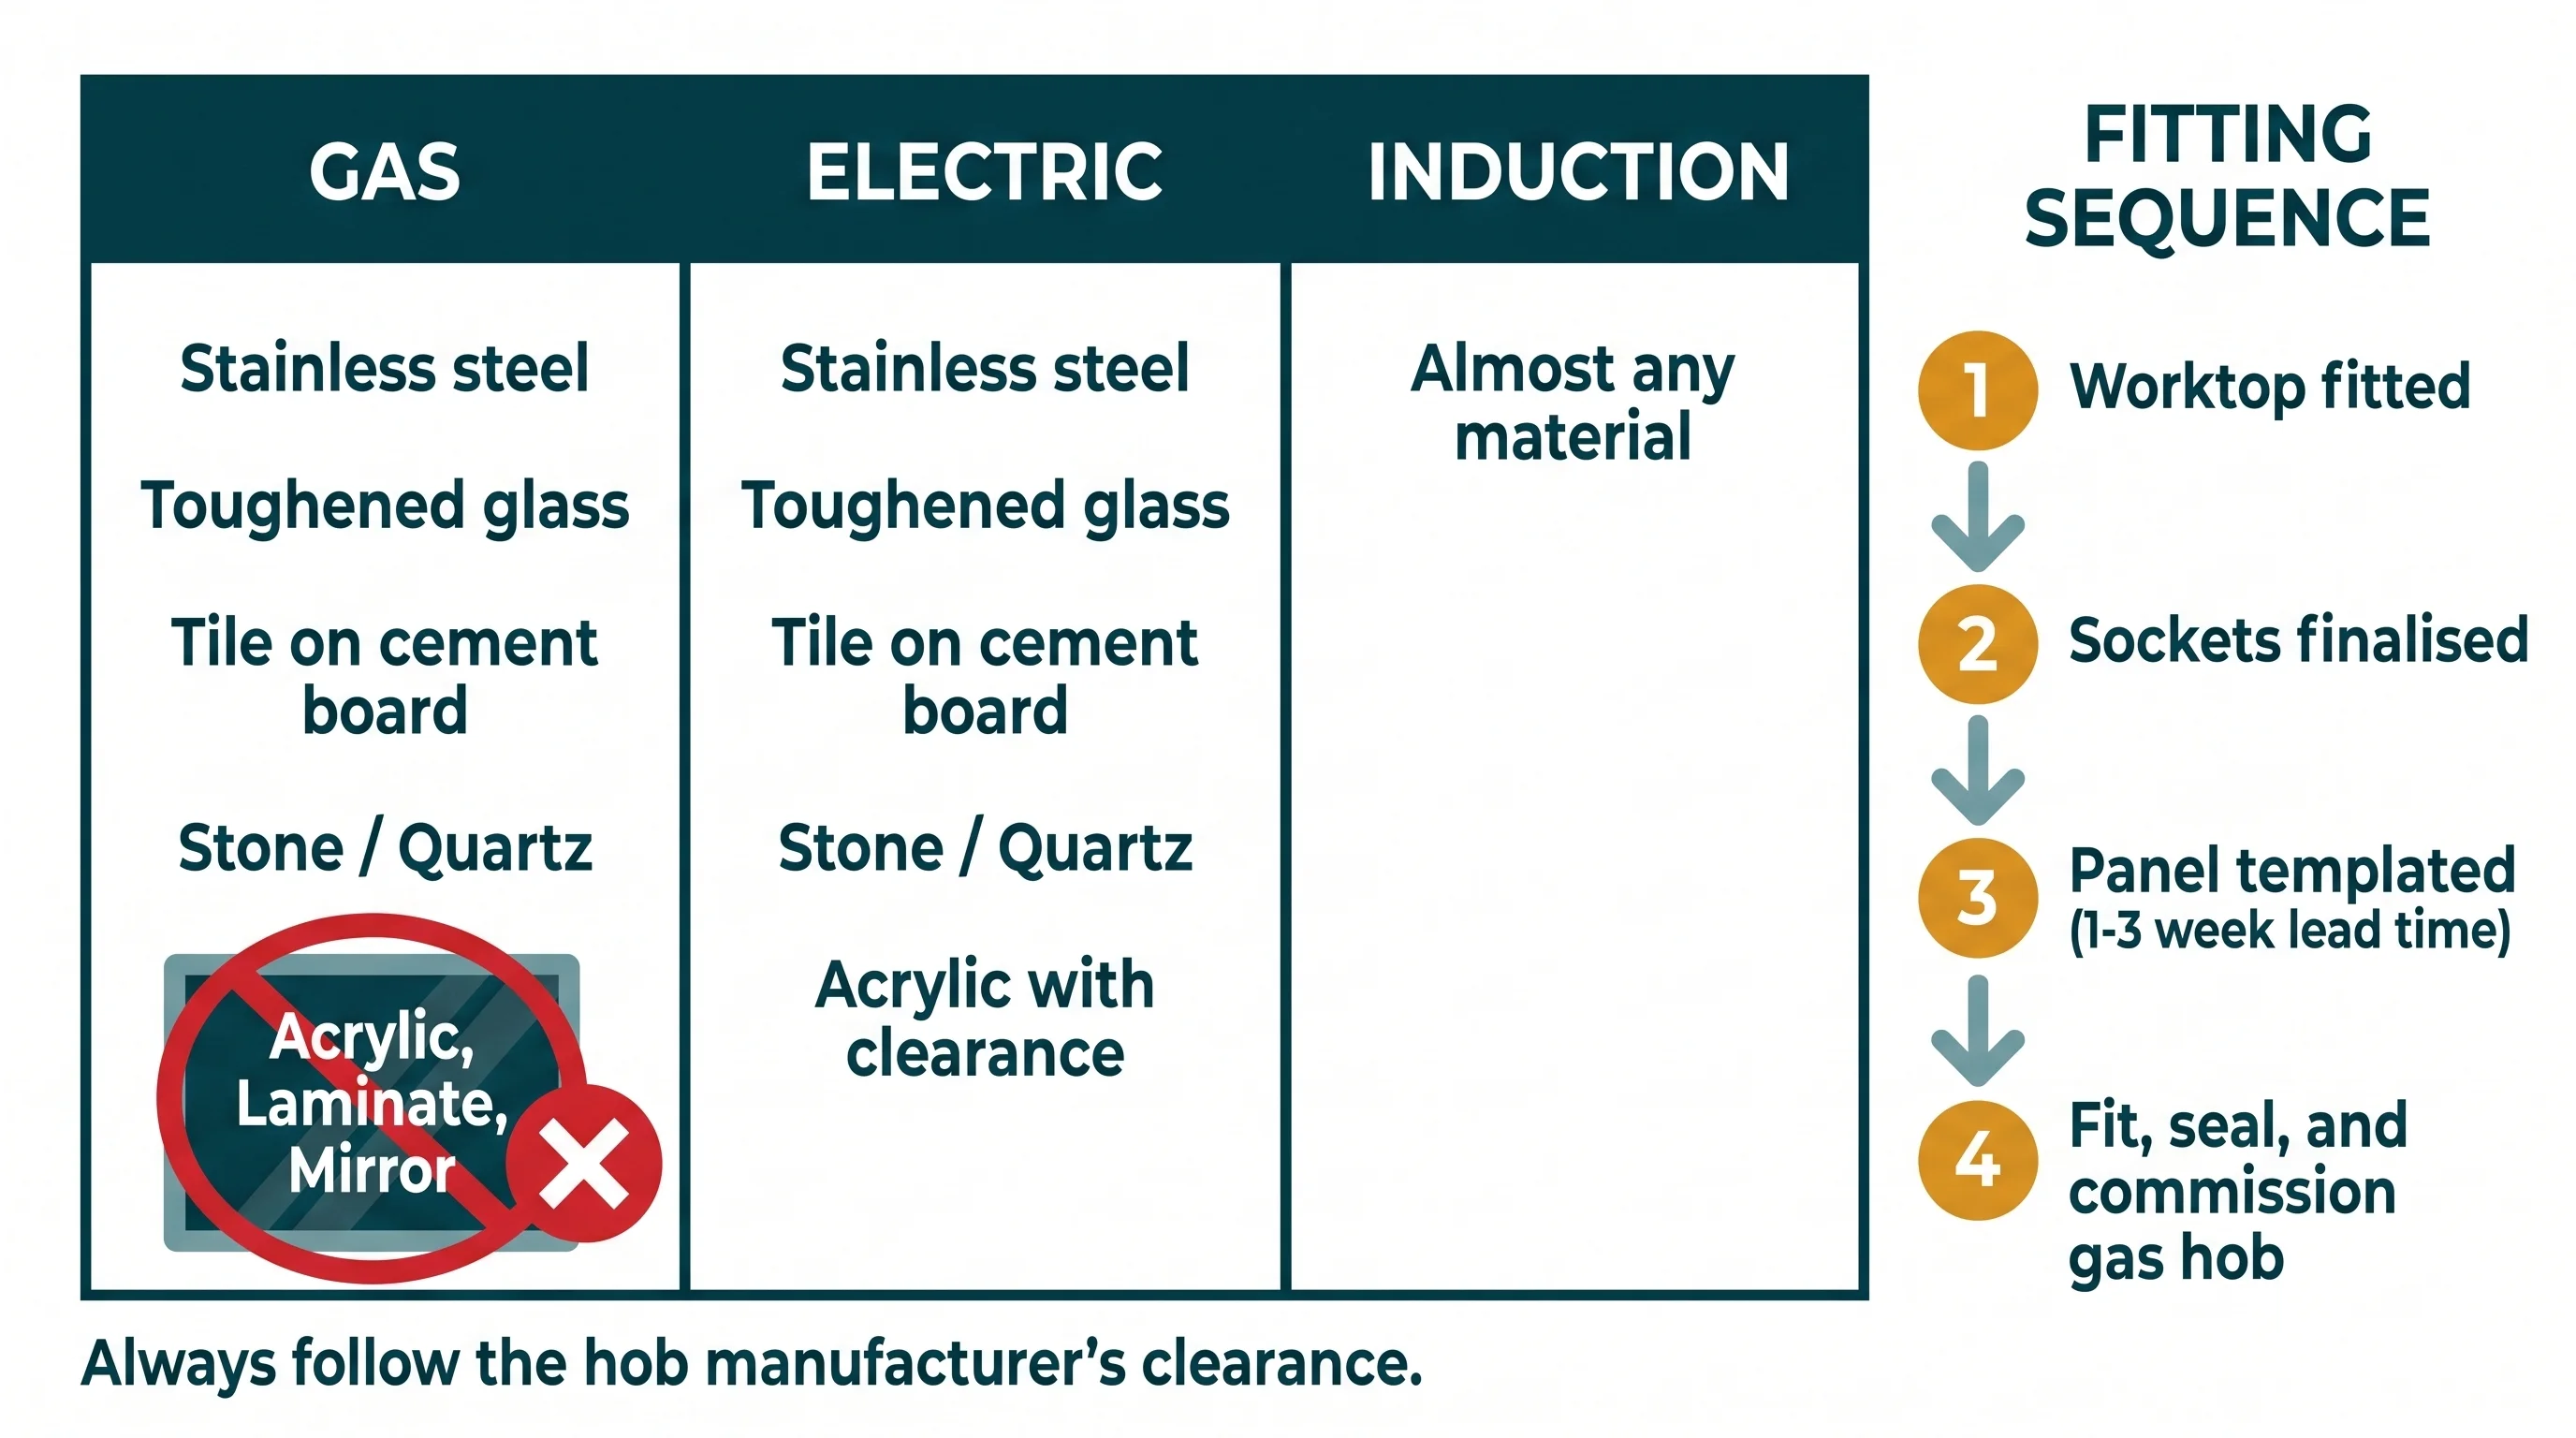
Stone and quartz worktops cannot be cut on site. The templater comes once the base units are set in their final positions, measures every surface and marks the sink and hob cutouts, and the worktops are then fabricated off site and brought back in a separate visit.
That gap sits in the middle of your kitchen install, not before it. During it you have no worktop, no connected sink and no usable hob. It is a property of the product you chose when sourcing units and worktops, so ask your fabricator for their lead time before you order and put it straight onto the programme.
One sequencing trap: the templater needs the walls plastered but the splashback untiled. Tile the splashback first and the template will not capture the real wall profile.
Inspect as each trade finishes
Do not save your checking for the end. By then the plasterer is on another job, the decorator has already painted over the problem, and the person who caused it has been paid.
Look at plaster under a raking light before the decorator starts, so hollows and trowel marks get sorted while it is still one trade's responsibility. Test every socket, switch and light, and get the electrical certificate in your hands, before the van leaves. Check waste connections for leaks and correct falls while the pipework is still accessible. Walk the floor for lipping and hollow tiles before anything gets built on top of it.
Second fix is where every decision made in planning, design and first fix becomes visible and permanent. Work that was rushed to save a few days shows in the finish for as long as you own the house.